Square Dance Nebraska - Ideas
- Decorations
Decorating With Balloons
Decorating with balloons
can give a lot of bang for your buck. They can cover a
lot of space and give dramatic eye appeal. While it may
seem expensive when you first start pricing it out,
realize that balloons and some ribbon is all you will
probably need!
If you are using helium, be sure to get
the proper balloons. With helium you will need to rent
the canister and a regulator. The quick ties are
wonderful finger-savers. Wherever you rent your canister,
they will help you determine the amount of helium you
will need to fill the desired number of balloons. If you
can use nine inch balloons, over eleven inch ballons, you
will save on the amount of helium needed, getting more
bang for your buck. Also, while party stores are often
prepared to rent you helium, check in the Yellow Pages
under "gas" and see if you can find a better
price at a store that rents out various types gasses to
various businesses. And remember to put your reservation
in early if you are going to be preparing for a holiday
party!
Along with renting helium, you can also
rent regular air tanks. If you have a lot of balloons to
blow up and are feeling a bit low on lung power, it may
be your best option. There is also another type of gas
that is heavier than air which allows for balloons to
fall faster or hang a bit straighter in cases of balloon
drops or simply hanging balloons from the ceiling. Ask
your supplier and they will know what you need.
|
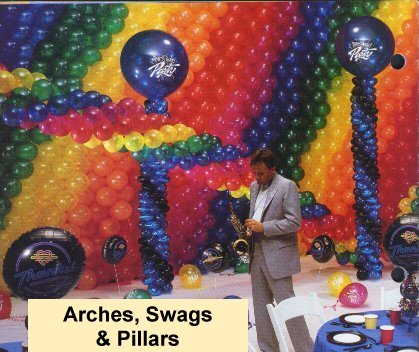 While
an entire background of balloons may be a bit much, look
in front of that and you will see half of an arch and two
columns. A swag would be the same design as an arch
except it will hang and only need air instead of helium.
If you could hang your columns you will also be able to
save on money.
Putting together an arch, swag or column seems a bit
confusing at first but once you get started you get the
hang of it pretty easy and they will go together a lot
faster than you may think.
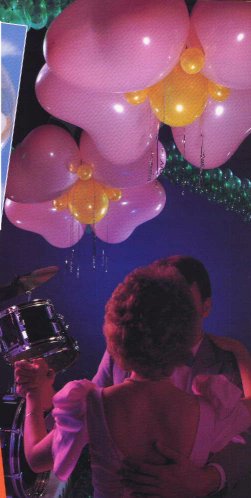
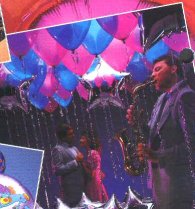
In the photos, the items are designed in colors. While
it's not necessary, you may wish to tackle it and so the
instructions for both planning the color strategy and
putting the items together are below.
|
The Basics
The four-balloon cluster is the basic unit of a spiral which,
depending on whether the balloons are filled with air or helium,
is used to create arches, swags and columns. With variations and
imagination, you can design any number of colorful effects for
parties, banquets, or stage settings. The following instructions
are for making the basic four-balloon cluster using eleven inch
latex balloons. Use helium if the spiral is to be used as an
arch; air for pillars and swags.
Materials to Assemble the Basic Spiral
50 lb. test monofilament fishing line
#11 latex, four assorted colors (refer to That Figures)
to determine the number of balloon clusters needed for spirals of
different lengths.
Paper clips - the recommendation is to use only ACCO brand
(except Acco World). I'm not sure why but the two type of
paperclips are the smooth coated and rough coated.
HINT: Spirals are most easily constructed when you have a team or
assembly line. Each person performing a specific task. For
example, two people to inflate balloons, and one or two to
prepare clusters and attach to line. Of course, the number of
spirals needed will determine the size of your team.
To Begin: Cut a length of 50-pound line four feet
longer than the desired length of spiral. Stretch horizontally so
line is very taut, attaching one end with a slip knot to doorknob
or other fixture that will provide a flat surface, such as a door
or wall, and other end to study structure, such as a chair or
table leg.
To make four-balloon cluster: Inflate four 11-inch round latex
balloons in desired colors. Be sure to maintain a consistent
balloon size (which allows cluster to nest properly when attached
to line. For the best results you can use a balloon template
available from some balloon distributors.
 Holding a strong paper clip in one hand
with the double-rounded end pointing down, gently push center of
clip out with thumb (Figure 1).
Holding a strong paper clip in one hand
with the double-rounded end pointing down, gently push center of
clip out with thumb (Figure 1).
Hook four balloons (one of each color) onto the paper clip by
pushing the end of the paper clip through the tail of each
balloon, close to the lip end of the tail. Move all four balloons
at once around the clip to the inside, opposite the
double-rounded side (Figure 2).
Attach paper clip to taut line (near point where
spiral starts), making sure line is completely inside clip
(Figure 3). Secure cluster to line by wrapping any balloon in
cluster around the line (Figure 4), making sure to wrap the
balloon below the knot on the tail. Push cluster into place at
end of line next to flat surface (Figure 5). NOTE: Cluster must
lie flat against surface in order to "nest" subsequent
clusters.
Prepare second cluster as before. After balloons attached to
clip, arrange them in same color patter as first cluster. Secure
second cluster to line as before, near first cluster (refer to
Figure 3 and 4). Push second cluster firmly up against first
cluster, rotating balloons (clockwise or counter-clockwise) so
second cluster is nest (at 45 degree angle) into first cluster,
with balloons of same color adjacent to each other (Figure 6 at
top). Once cluster is properly positioned, push paper clip
farther down line toward first cluster to hold clusters firmly
together.
Continue adding clusters to line in this manner until spiral is
desired length. NOTE: If necessary, any balloon in the spiral can
be replaced by attaching a single balloon on a paper clip to
line. If clusters are secured and wrapped properly, the line may
be cut at any point and sections will remain intact.
VARIATIONS ON A THEME
Arches: Once spiral is
complete, attach each end of the line to a brick to anchor.
Helium-inflated balloons will float skyward, forming a natural
arch. NOTE: Manufacturer says applying Qualatex HeiliumHold to
the balloons before inflating will provide extra-long lift to the
arch. Not that I knows what that means but it may be worthwhile
to research it.
Swags: Anchor each end of an
air-inflated spiral to wall, ceiling, or other fixture such as a
basketball goal. The balloons will swoop downward from their
anchors. The spiral can also be anchored to any point between the
ends to create multiple swags with one spiral.
Pillars: Form a pillar by
positioning the spiral vertically and anchoring the top to the
ceiling or to a helium-filled #40 Paddle-latex balloon. Anchor
the bottom to the floor with a brick, duct tape, or drapery hook.
For a unique looking pillar, use Microfoil and latex balloons to
construct the four-balloon clusters. NOTE: This type of spiral
does not require paper clips.
 To make foil/latex cluster: Air-inflate and heat
seal two 9-inch foils (in one or two colors). Tie tails of foils
together near the middle of tails (Figure B-1).
To make foil/latex cluster: Air-inflate and heat
seal two 9-inch foils (in one or two colors). Tie tails of foils
together near the middle of tails (Figure B-1).
Air-inflate two 5-inch latex (again, we recommend using a balloon
template for consistent sizing). Tightly twist tails and tie them
together. NOTE: Do not tie a know in each balloon separately.
Wrap latex and foil balloons tails together to form the cluster
(Figure B-2). Attach to line near starting point by wrapping one
of latex necks (below knot) around line. Position cluster against
flat surface as in basic spiral. Foil balloons should be
positioned perpendicular to line so they lie flat against surface
and each other in spiral. If foil balloons seem loose, wrap one
around line until tight.
Continue adding clusters as above, creating spiraling effect as
described in basic spiral.
When spiral complete, attach one end of line to brick to anchor.
Helium-inflate a 40-inch latex and attach to other end of line.
It will provide enough lift to hold pillar upright.
OTHER VARIATIONS: Spirals
using four-balloon clusters may be constructed with any size
balloons: 5-inch, 9-inch, 11-inch, or 16-inch. Of course, spirals
made with 5-inch balloons are suitable for air inflation only.
Five-balloon spirals may also be used, depending on the density
and color needed in the spiral.
COLUMNS OF COLOR
Balloons murals are used to display a company, school, or team
logo; to carry a message, initials, or a figure; or to coordinate
a color theme.
A mural is made up of columns of balloons that are packed tightly
together when finished to achieve the look of a solid wall. The
basic unit of the column is again the four-balloon cluster.
However, unlike the spiral which is created by nesting each
cluster on the line (at a 45 degree angle) into the previous one,
the column is constructed from clusters formed according to a
color pattern that is pre-determined using a balloon grid (Figure
C at bottom). Balloon murals may be constructed to view from one
side (against a wall) or from both sides (in the middle of a
room).
As with the spiral, it is best to construct a balloon mural using
a team or assembly line. One person supervises the construction
of clusters (and columns) using the completed balloon grids as a
guide, and several others inflate balloons, from the clusters,
and attach them to the appropriate line (nesting them as
required). As before, we strongly suggest the use of a balloon
template to ensure consistent balloon size.
To design a balloon mural: First, determine the size of the
finished mural, the balloon size, the number of balloons in each
column, and the number of columns needed to complete the mural.
NOTE: The balloon size will affect both the number of balloons in
each column and the number of columns needed for the mural.
Once that information is determined, color in the grid (Figure
C-1 at bottom) to show the finished mural. Using the completed
grid as a guide, code the individual balloons in each column,
cluster by cluster, according to color (Figure C-2 at bottom).
Use numbers or the first letter of each color to code balloons in
each cluster.
As you code balloons, remember that the grid displays only one
side of the column, which shows a partial view or section of each
four-balloon cluster. Thus, any balloon that is positioned behind
another within one cluster must be the same color. For example,
clusters with three balloons shown require that the two center
balloons be the same color. Clusters with two balloons require
that the two rear balloons be the same colors as the front
balloons.
Once the grids are complete, you are ready to begin: Using a
50-pound test monofilament fishing lie (as for spirals) secure
the appropriate number of lines to the ceiling and carpet by
tying the line to a standard drapery hook (leaving space between
each line to allow you to work with the individual columns). Use
duct tape to secure the line to hard surface floors.
Construct the mural starting with the center column, assembling
columns from the bottom up, according to your color-coded grids.
To attach and secure four-balloon clusters to the line, follow
the instructions outlined in The Basics above. Subsequent
clusters will be nested according to your grid pattern.
When all columns are finished, tighten the space between them so
the columns nest as planned on the grid. If the mural needs more
support, weave fishing line from column to column, pulling the
line taut as you go from one end of the mural to the other.
On to That
Figures
Square Dance Nebraska - Ideas - Decorations